User Guide – Hardware Repair
Request Tracker
Login to the System
To access the
Hardware Repair Request Management System, follow the steps below:
Open a web
browser (such as Google Chrome, Mozilla Firefox, or Microsoft Edge).
1.
Enter
the system URL in the address bar and press Enter.
2.
The
Login Page will be displayed.
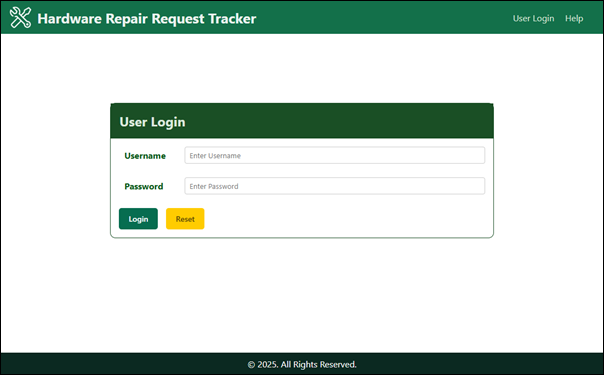
3.
Enter
your Username in the Username field.
4.
Enter
your Password in the Password field.
5.
Click
the Login button.
6.
If
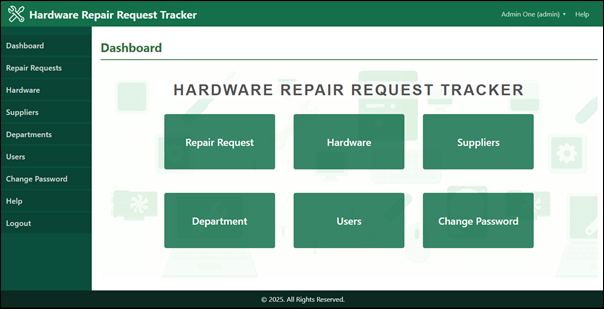
the entered credentials are correct, the system will redirect you to the
Dashboard.
Note:
·
Ensure
that the username and password are entered correctly.
·
If
you forget your password, contact the system administrator for assistance.
User Roles
This system supports three
types of user roles. Each role has different access permissions and
responsibilities within the system.
Admin
The admin has full
control over the system, including user management, hardware management,
department management, accept/reject repair requests, assign technicians to
repair request and overall monitoring of repair requests.
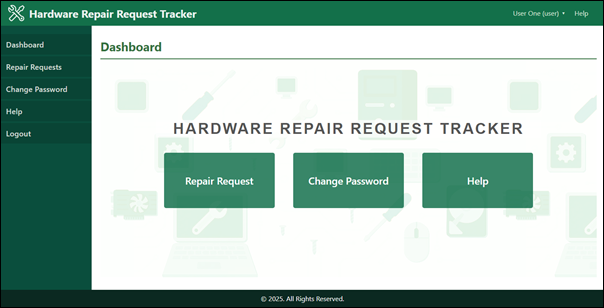
User
The User can create
hardware repair requests, view the status of submitted requests.
Technician
The Technician is
responsible for handling assigned repair requests and updating repair statuses,
List Users
Users can be
view by clicking the “Users” from the sidebar. (Only Admin can view users)
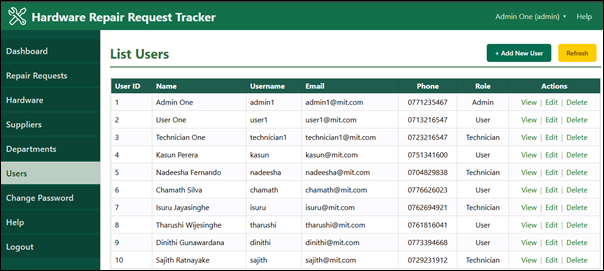
Add New User
Follow the
steps below to add a new user to the system:
- Click “Users” from the
sidebar menu.
- On the List Users page,
click the “+ Add New User” button.

- Enter the required user
details in the provided fields.
- Click the “Add User”
button to save and create the new user account.
Note:
- Only users with Admin
privileges are allowed to add new users.
- Ensure all required fields are
filled correctly before submitting.
Edit User
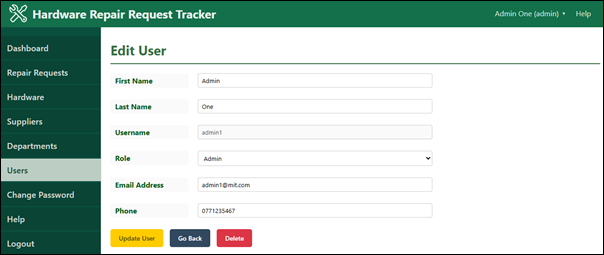
Follow the
steps below to edit an existing user in the system:
- Click “Users” from the
sidebar menu.
- On the List Users page,
click the “Edit” button under the Action column of the
relevant user record.
- Modify the required user
details in the provided fields.
- Click the “Update” button
to save the changes.
Note:
- Only users with Admin
privileges are allowed to edit user details.
- Ensure all required fields are
filled correctly before submitting.
Delete User
Follow the
steps below to delete a user from the system:
1.
Click
“Users” from the sidebar menu.
2.
On
the List Users page, locate the user you want to remove.
3.
Click
the “Delete” button under the Action column of the relevant user record.
4.
A
confirmation message will be displayed.
5.
Click
“Confirm” to permanently delete the user from the system.
List Hardware
Hardware can
be view by clicking the “Hardware” from the sidebar.
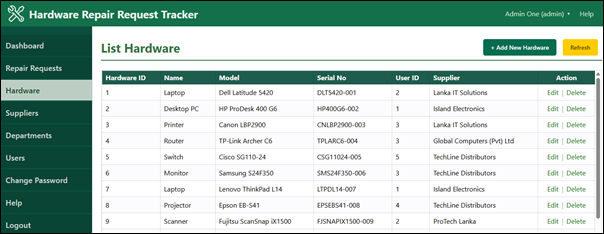
Add New Hardware
Follow the
steps below to add a new hardware to the system:
- Click “Hardware” from the
sidebar menu.
- On the List Hardware page,
click the “+ Add New Hardware” button.

- Enter the required hardware
details in the provided fields.
- Click the “Add Hardware”
button to save and create the new hardware.
Note:
- Only users with Admin
privileges are allowed to add new hardware.
- Ensure all required fields are
filled correctly before submitting.
Edit Hardware

Follow the
steps below to edit an existing hardware in the system:
- Click “Hardware” from the
sidebar menu.
- On the List Hardwarepage,
click the “Edit” button under the Action column of the
relevant hardware record.
- Modify the required hardwaredetails in the provided fields.
- Click the “Update Hardware”
button to save the changes.
Note:
- Only users with Admin
privileges are allowed to edit hardware details.
- Ensure all required fields are
filled correctly before submitting.
Delete Hardware
Follow the
steps below to delete a hardware from the system:
1.
Click
“Hardware” from the sidebar menu.
2.
On
the List Hardware page, locate the hardware you want to remove.
3.
Click
the “Delete” button under the Action column of the relevant hardware
record.
4.
A
confirmation message will be displayed.
5.
Click
“Confirm” to permanently delete the hardware from the system.
List Departments
Departments
can be view by clicking the “Departments” from the sidebar.
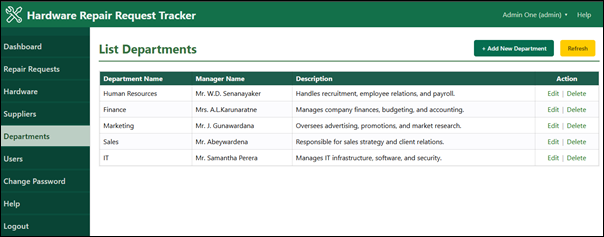
Add New Department
Follow the
steps below to add a new department to the system:
- Click “Departments” from
the sidebar menu.
- On the List Departments page,
click the “+ Add New Department” button.
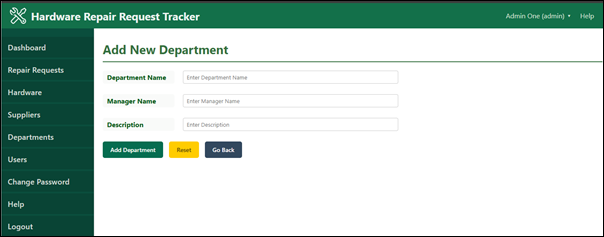
- Enter the required department details
in the provided fields.
- Click the “Add Department”
button to save and create the new department.
Note:
- Only users with Admin
privileges are allowed to add new departments.
- Ensure all required fields are
filled correctly before submitting.
Edit Department
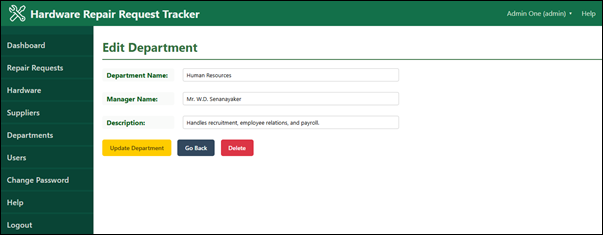
Follow the
steps below to edit an existing Department in the system:
- Click “Departments” from
the sidebar menu.
- On the List Departments page,
click the “Edit” button under the Action column of the
relevant department record.
- Modify the required department
details in the provided fields.
- Click the “Update” button
to save the changes.
Note:
- Only users with Admin
privileges are allowed to edit department details.
- Ensure all required fields are
filled correctly before submitting.
Delete Department
Follow the
steps below to delete a department from the system:
6.
Click
“Departments” from the sidebar menu.
7.
On
the List Departments page, locate the department you want to remove.
8.
Click
the “Delete” button under the Action column of the relevant department
record.
9.
A
confirmation message will be displayed.
10.
Click
“Confirm” to permanently delete the department from the system.
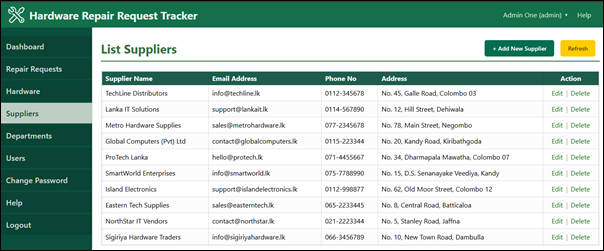
List Suppliers
Supplier can
be view by clicking the “Suppliers” from the sidebar.
Add New Supplier
Follow the
steps below to add a new supplier to the system:
- Click “Suppliers” from the
sidebar menu.
- On the List Suppliers page,
click the “+ Add New Supplier” button.
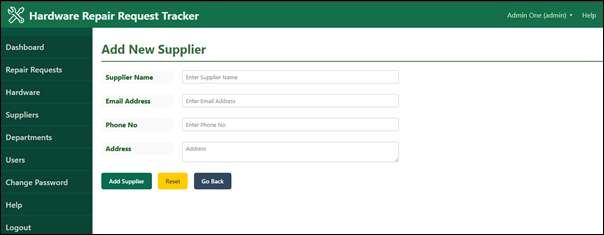
- Enter the required supplier details
in the provided fields.
- Click the “Add Supplier”
button to save and create the new Supplier.
Note:
- Only users with Admin
privileges are allowed to add new Supplier.
- Ensure all required fields are
filled correctly before submitting.
Edit Supplier
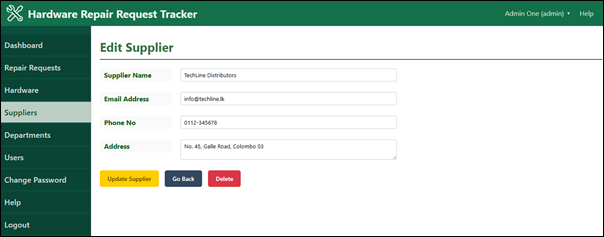
Follow the
steps below to edit an existing supplier in the system:
- Click “Suppliers” from the
sidebar menu.
- On the List Suppliers page,
click the “Edit” button under the Action column of the
relevant supplier record.
- Modify the required supplier
details in the provided fields.
- Click the “Update Supplier”
button to save the changes.
Note:
- Only users with Admin
privileges are allowed to edit supplier details.
- Ensure all required fields are
filled correctly before submitting.
Delete Supplier
Follow the
steps below to delete a supplier from the system:
1.
Click
“Suppliers” from the sidebar menu.
2.
On
the List Suppliers page, locate the supplier you want to remove.
3.
Click
the “Delete” button under the Action column of the relevant supplier record.
4.
A
confirmation message will be displayed.
5.
Click
“Confirm” to permanently delete the supplier from the system.
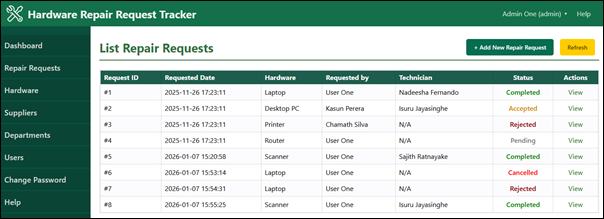
List Repair Requests
Repair
Requests can be view by clicking the “Suppliers” from the sidebar.
Add New Repair Request
Follow the
steps below to add a new repair request to the system:
- Click “Repair Requests”
from the sidebar menu.
- On the Repair Requests page,
click the “Add New Repair Request” button.
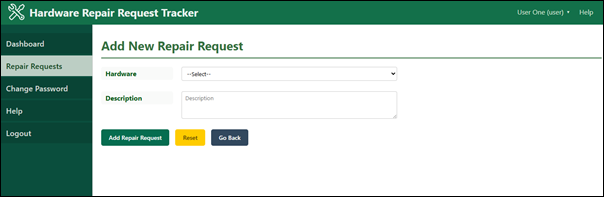
3. Select the hardware item that needs to
be repaired.
4. Enter a clear description of the
issue.
5. Click the “Submit” or “Add Repair
Request” button to create the repair request.
Note:
·
Provide
accurate details to help technicians diagnose the issue faster.
·
You
can track the status of the repair request after submission.
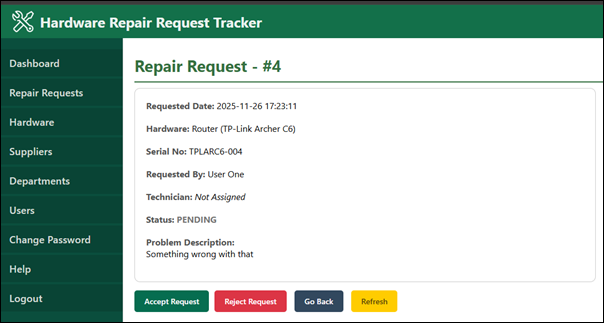
Accept the Repair Request
Follow the
steps below to accept the repair request. (Only admin can accept
requests)
1.
Click
“Repair Requests” from the sidebar menu.
2.
On
the Repair Requests page, click the “View” button under the Action
column of the relevant repair request.
3.
Click
the “Accept Request” button to initiate the request acceptance process.
4.
The
Accept Request page will be displayed.
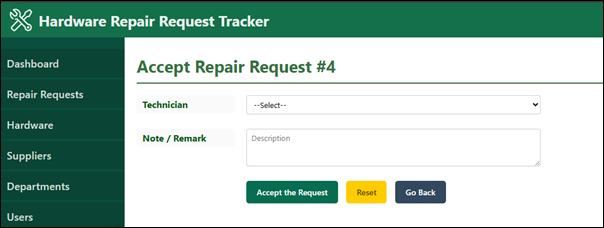
5.
Select
a technician from the technician list.
6.
Enter
any notes or additional remarks (if required).
7.
Click
the “Accept Request” button to confirm and assign the repair request.
Reject the Repair Request
Follow the
steps below to accept the repair request. (Only admin can accept
requests)
1.
Click
“Repair Requests” from the sidebar menu.
2.
On
the Repair Requests page, click the “View” button under the Action
column of the relevant repair request.
3.
Click
the “Reject Request” button to initiate the reject process.
4.
The
Reject Request page will be displayed.
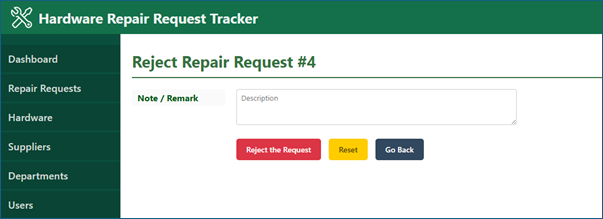
5.
Enter
any notes or additional remarks (if required).
6.
Click
the “Reject Request”.
Mark Repair Request as In Progress
Follow the
steps below to mark a repair request as In Progress:
- Click “Repair Requests”
from the sidebar menu.
- On the Repair Requests
page, click the “View” button under the Action column of the
relevant repair request.
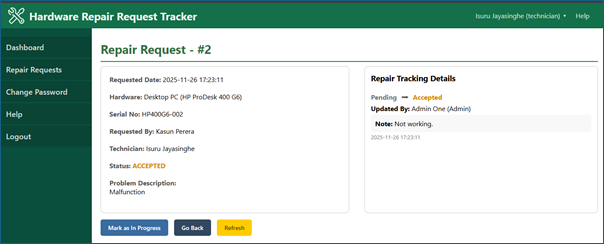
- Click the “Mark as In Progress” button.
Mark Repair Request as Completed
Follow the
steps below to mark a repair request as completed:
- Click “Repair Requests”
from the sidebar menu.
- On the Repair Requests
page, click the “View” button under the Action column of the
relevant repair request.
3. Click the “Mark Completed”
button.

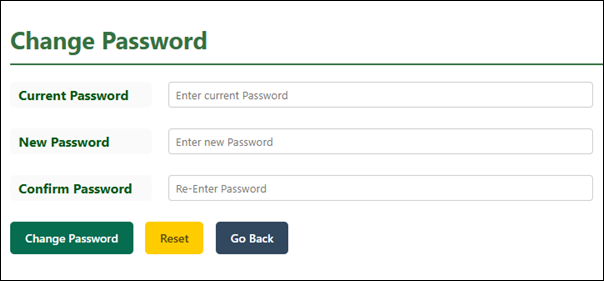
Change Password
Follow the
steps below to change your account password:
1.
Click
“Change Password” from the sidebar menu.
2.
Enter
your Current Password in the Current Password field.
3.
Enter
your New Password in the New Password field.
4.
Re-enter
the new password in the Confirm Password field to confirm it.
5.
Click
the “Change Password” button to save the changes.
Note:
The new
password and confirm password must match.
If the
current password is incorrect, the system will not allow the password to be
changed.